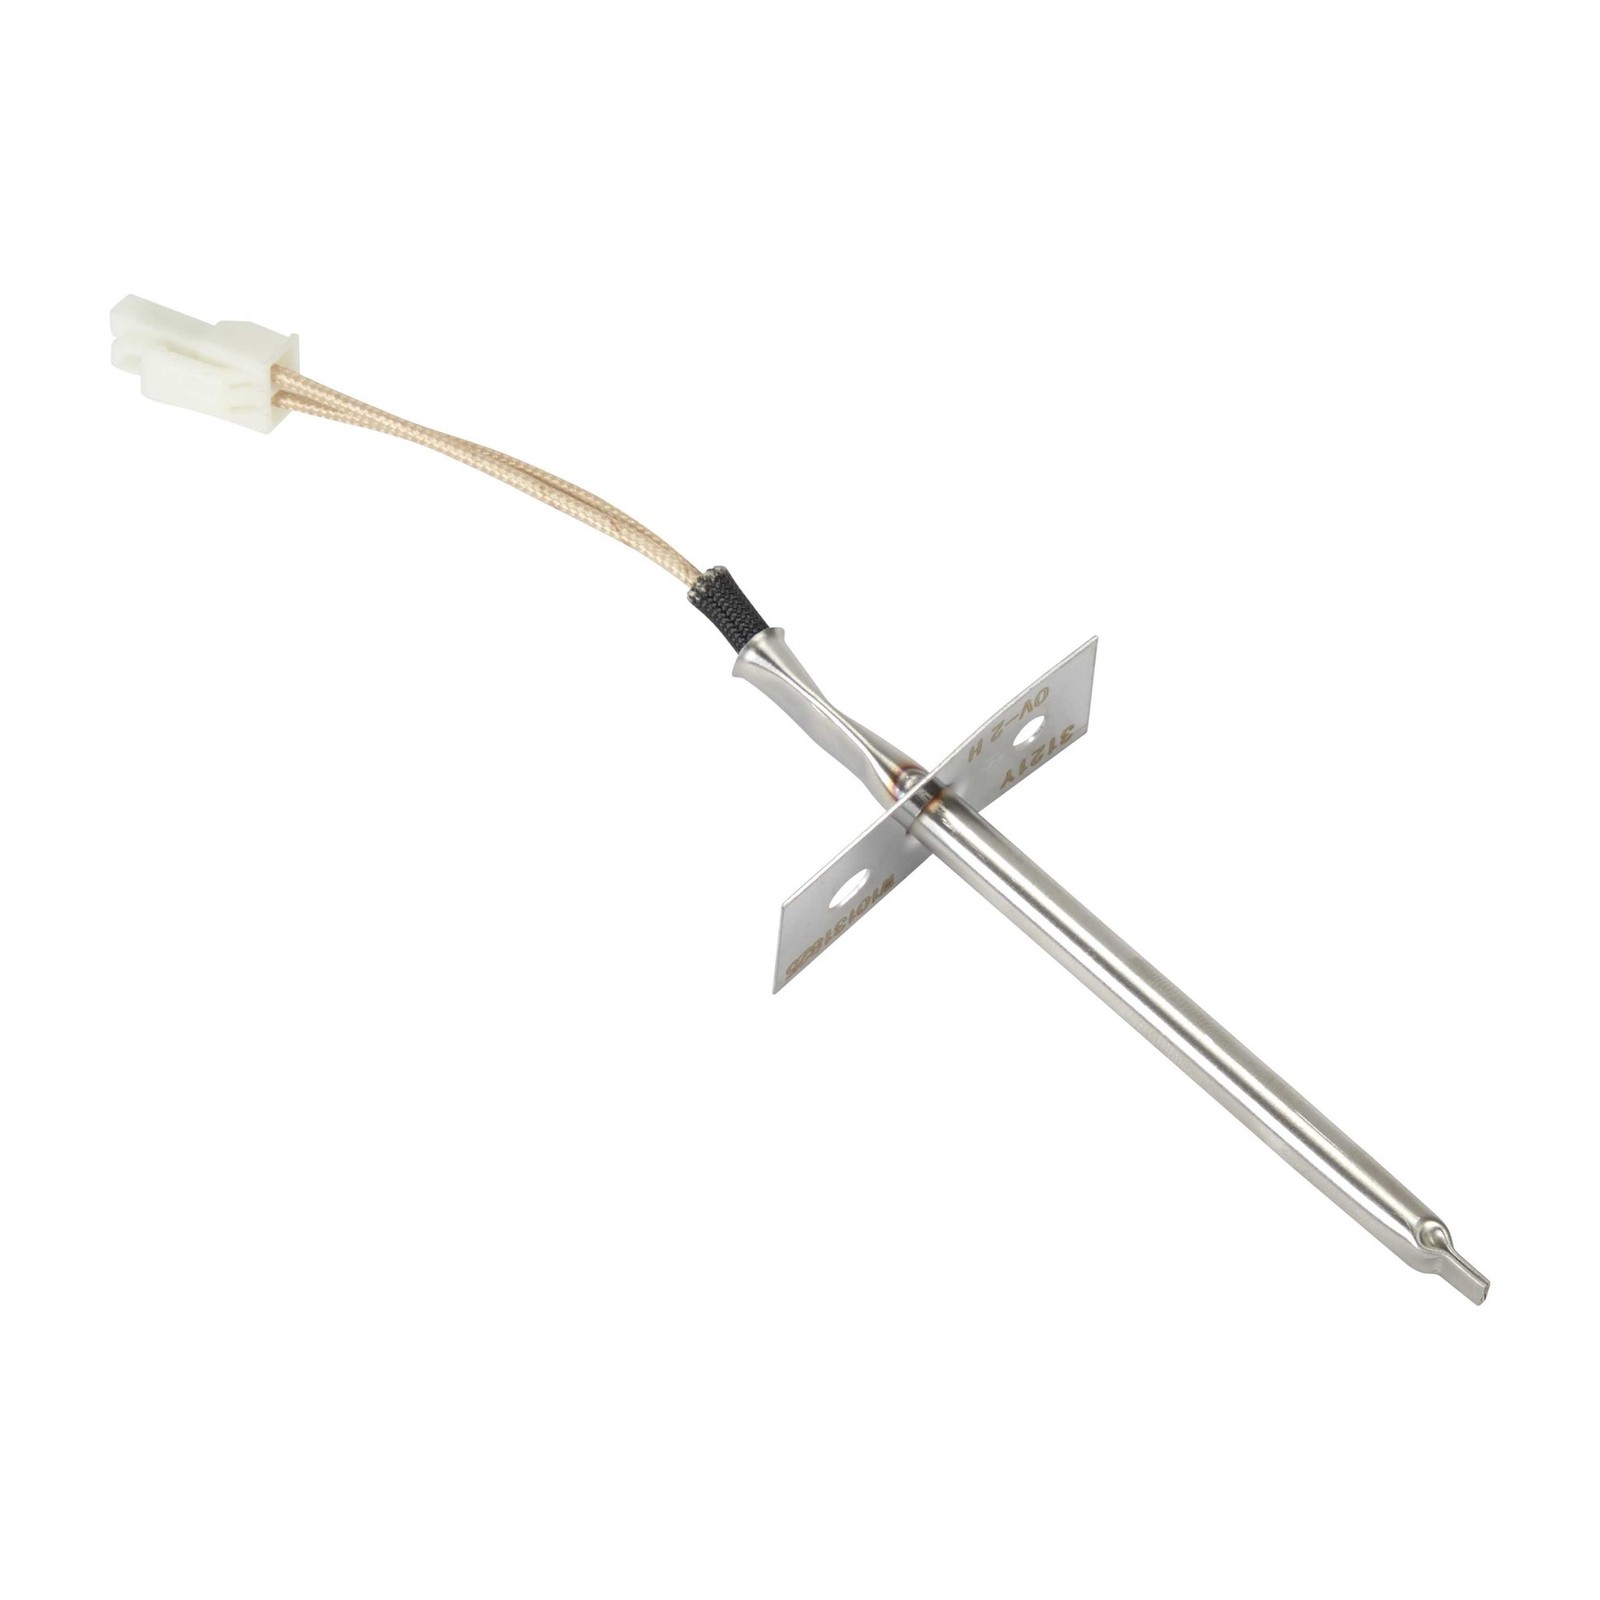
Whirlpool W10131825 | Whirlpool Range Temperature Sensor | Genuine OEM Part (Open box)
- Shipping $13.26 · arrives Thu, Nov 5 – Wed, Nov 11Ships from the United States in 1–2 business days, then 3–6 business days in transit, with tracking.
- 30-day returns · details
- Secure checkout with PayPal or any debit/credit card. If an item can't be shipped, you get your money back for it automatically.
Product details
Whirlpool W10131825 | Whirlpool Range Temperature Sensor | Genuine OEM Part (Open box).
Whirlpool W10131825 Range Oven Temperature Sensor
Genuine OEM Oven Interior Cavity RTD Temperature Sensor Probe
Product Overview
The Whirlpool W10131825 is a genuine OEM oven temperature sensor probe. Protruding directly through the rear insulation liner wall inside the baking cavity, this specialized Resistance Temperature Detector (RTD) acts as the electronic thermometer for your oven. As the interior air heats up, the sensor's internal electrical resistance changes predictably, transmitting real-time micro-ohm readings back to the main electronic control board to regulate the cycling of bake, broil, or convection elements.
As an Authentic Whirlpool Factory Certified Component , this probe is constructed from a high-purity stainless steel sheath and a ceramic thermal break capable of handling self-cleaning temperatures. It is calibrated to match your appliance's master programming precisely, preventing erratic temperature swings and ensuring your meals cook evenly every time.
When to Replace the Oven Temperature Sensor
- Oven Displays Error Codes (e.g., F3, F3-E0, F1): The control panel locks up and displays a dedicated diagnostic code signaling that the sensor circuit is completely shorted or wide open.
- Severe Under-Baking or Over-Baking: Food consistently burns or stays raw because the sensor's calibration has drifted out of tolerance, causing the oven to run 50°F to 100°F hotter or colder than your setting.
- Oven Fails to Heat Up: Setting the baking cycle initiates the selection on screen, but the elements never glow hot because the control board reads an invalid temperature signal and cuts power as a safety measure.
Technical Specifications
- Part Number: W10131825 (Directly replaces 1447228, AH1961476, AP6015507, EA1961476, PS11748784)
- Part Type: Oven Interior Cavity Thermal Resistor Sensor Probe
- Ohmic Rating: Standard room-temperature reference calibration of approximately 1,080 to 1,100 ohms ($1080\Omega - 1100\Omega$ at 75°F).
- Features: Heavy-gauge stainless steel probe jacket, a integrated dual-screw mounting flange, and a direct plug-in quick connector wire loom.
- Condition: Brand New, Genuine Whirlpool OEM Part
- Compatibility: Universally specified for an extensive catalog of slide-in or freestanding gas and electric ranges, slide-out wall ovens, and drop-in stoves branded under Whirlpool, Maytag, KitchenAid, JennAir, Amana, Estate, Roper, and Kenmore.
Professional Installation & Troubleshooting Tips
Safety Note: HIGH VOLTAGE SHOCK HAZARD. Completely isolate your appliance from home power before servicing. Unplug the range from its heavy wall receptacle or trip the dedicated main double-pole circuit breakers at your home's breaker box. Pro Tip: You can test if your old sensor is actually defective before unboxing the new one. Use a digital multimeter set to the Ohms ($\Omega$) scale and touch the meter leads to the two prongs inside the sensor plug. If the reading is drastically away from 1,080 ohms at room temperature (e.g., zero ohms or infinity), the part is completely dead and must be replaced. Installation Hack: The W10131825 probe can typically be replaced entirely from inside the oven cavity, avoiding the need to pull the heavy stove away from the wall. Simply remove the oven racks, unscrew the two 1/4-inch hex screws holding the sensor's mounting plate to the back wall, and pull the sensor gently forward into the cavity. The wiring harness connection plug will slide through the cutout hole. Unclip the white plastic connector and snap your fresh sensor directly in its place. Warning: When pulling the old sensor forward into the oven cavity, do not yank or yank the wires too hard. If the wiring harness unplugs prematurely or slips from your fingers, it can slide back behind the insulation layer, forcing you to pull the entire range out and remove the rear sheet-metal access panel to retrieve the wires. Maintenance Note: Avoid using heavy wire brushes or abrasive cleaning pads on the stainless steel sensor rod during routine oven cleaning, as deep surface gouges can affect its thermal conductivity and timing response.
Specifications
- Type: Temperature Sensor
- Country of Origin: United States
Condition: Open box